iOS用モバイルゲームのレベル選択画面の作成方法(自動テスト付き)- パート1
- Matt
- 2023年11月13日
- 読了時間: 6分
イントロダクション
ゲームを開発する際、ゲームの物語を豊かにし、興味深いメカニズムを導入するために異なるエリアや世界を紹介するのは論理的です。たとえば、私たちのゲーム『Falling Sky』の続編(まだチェックしていない場合は[https://apps.apple.com/app/id6446787964]をチェックしてください!)では、探索のための新しい惑星を導入し、各惑星に固有のチャレンジをもたらすことができます。一度惑星が救出されると、主人公であるOrionは次の惑星に移動できます。この記事では、Swiftを使用してiOS用にこれをどのように実現するかを示します。また、自動テストの実装にも深入りします。パート2では、ワールドが選択された後のレベル選択画面に焦点を当てます。
ワールドセレクターカルーセル
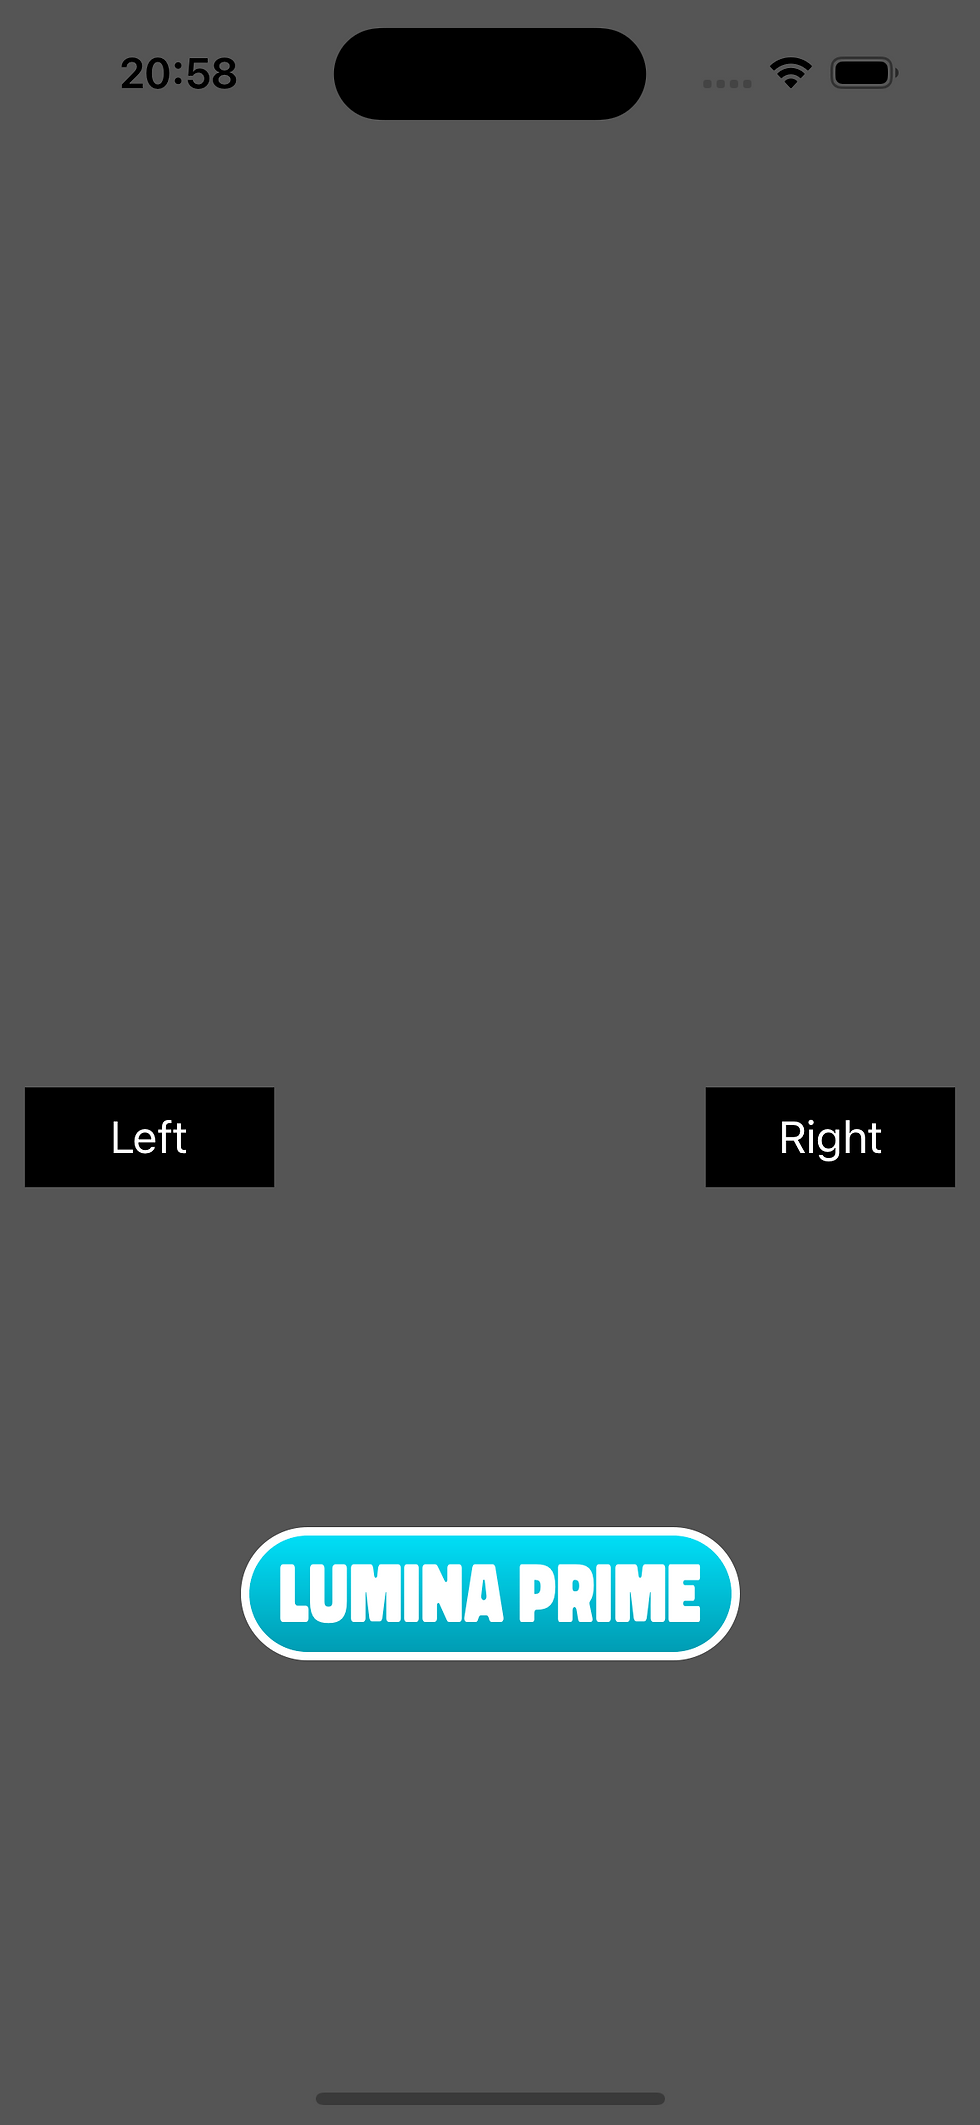
様々なUXデザインがありますが、一般的なアプローチにはスクロールビューが含まれます。これは、ワールドを垂直に積み重ねたボタンとしてレンダリングするか、水平にスクロールするかのいずれかです。私たちは、左右のナビゲーションボタン、およびワールド自体のための中央ボタンを持つ水平なアプローチを紹介します。このカルーセルデザインは、ユーザーが理解しやすく使用しやすい馴染みのあるコンセプトです。
ロックされたワールド
プレイヤーがゲームを進め、レベルをクリアすると、新しいワールドがアンロックされます。各レベルに対するスターレーティングシステムや、一定数のスターを獲得することでワールドがアンロックされるアプローチなど、異なる方法を検討します。ゲーム内通貨を使用する方法や、アプリ内課金でワールドのアンロックを早める方法もあります。アプリの効果的な収益化戦略の一環です。
自動テスト
テスト駆動のアプローチに従い、テストを定義してみましょう。Swift iOSプロジェクトのテストの設定に関する詳しいガイドについては、[https://www.kingdomarcade.co.uk/ja/post/iosアプリの効果的なuiテストの書き方]を参照してください。これらのテストは、機能と必要な動作を理解するための貴重なツールでもあります。
これらはワールド選択機能のために書くテストです:
testICanNavigateThroughToAllWorlds - これはハッピーパスです。一度実装されると、プレイヤーはすべてのワールドに移動できます。
testFirstWorldIsSelectableByDefault - このテストは、最初のワールドがデフォルトで選択可能であることを確認します.
testICanSelectWorld2IfAllLevelsInWorld1Completed - このテストは、次のワールドがアンロックされるとすぐにプレイ可能であることを確認します。
testWorld2IsLockedIfOnlySomeLevelsInWorld1Completed - このテストは、最初のワールドがまだクリアされていない場合、次のワールドがロックされていることを確認します。
これらのテストが実装されると、ワールドの選択画面が動作し、ワールドがアンロックされる機能が備わります。ロジックがアプリ内通貨やアプリ内課金に基づいている場合、これらのテストを更新するとその動作が反映されます。
それでは、コードに移りましょう!
アプリのHomeViewControllerには、「Worlds」と呼ばれるコンポーネントを追加します。これには、ワールドがロックされているかどうかを示す関数と、ワールドが選択されたときの処理を行う必要があります。
Worlds.swift:
import UIKit


class Worlds: UIView {
    // this scrollview controls and hosts the pagination of the worlds
    var scrollView: UIScrollView! = nil
    // this is the callback we fire when a world is selected enabling the HomeViewController to load the level selection screen for the world in question - in part 2 this will get refactored to "onLevelSelected"
    var onWorldSelected: ((Area) -> ())! = nil

    convenience init(appF: AppFunctions, onWorldSelected: @escaping (World) -> ()) {
        self.init()
        self.onWorldSelected = onWorldSelected

        scrollView = UIScrollView()
        self.addSubview(scrollView)

        scrollView.translatesAutoresizingMaskIntoConstraints = false

        //the track view contains the world buttons which we paginate through
        let stackView = UIStackView()
        stackView.axis = .horizontal
        stackView.spacing = 0
        stackView.translatesAutoresizingMaskIntoConstraints = false
        scrollView.addSubview(stackView)

        let screenBounds = UIScreen.main.bounds
        let buttonWidth = screenBounds.width * 0.6

        //here we get the detail on whether a world is locked or unlocked, the gets passed down so can render the "locked" button view, perhaps with a padlock
        let levelResults = try! appF.getLevelResults()
        let worlds = World.allCases.map {world in
        //world button is the button to select the world. this could be a more interesting animated view
            WorldButton(width: buttonWidth, world: World, isUnlocked: levelResults.isWorldUnlocked(world), onTouch: onWorldButtonTouch)
        }

        for item in worlds {
        // we put each world button centered into a view.
            let itemView = UIView(frame: scrollView.frame)
            itemView.addSubview(item)
            item.translatesAutoresizingMaskIntoConstraints = false
            item.centerXAnchor.constraint(equalTo: itemView.centerXAnchor).isActive = true
            item.centerYAnchor.constraint(equalTo: itemView.centerYAnchor).isActive = true
            stackView.addArrangedSubview(itemView)

            itemView.widthAnchor.constraint(equalTo: scrollView.widthAnchor).isActive = true
            itemView.heightAnchor.constraint(equalTo: scrollView.heightAnchor).isActive = true
        }


        scrollView.leadingAnchor.constraint(equalTo: leadingAnchor).isActive = true
        scrollView.trailingAnchor.constraint(equalTo: trailingAnchor).isActive = true
        scrollView.topAnchor.constraint(equalTo: topAnchor).isActive = true
        scrollView.bottomAnchor.constraint(equalTo: bottomAnchor).isActive = true

        stackView.leadingAnchor.constraint(equalTo: scrollView.leadingAnchor).isActive = true
        stackView.trailingAnchor.constraint(equalTo: scrollView.trailingAnchor).isActive = true
        stackView.topAnchor.constraint(equalTo: scrollView.topAnchor).isActive = true
        stackView.bottomAnchor.constraint(equalTo: scrollView.bottomAnchor).isActive = true
        stackView.heightAnchor.constraint(equalTo: scrollView.heightAnchor).isActive = true

        scrollView.contentSize = CGSize(width: CGFloat(areas.count) * frame.size.width, height: frame.size.height)
        scrollView.isPagingEnabled = true

        //add a left button to scroll left
        let leftButton = UIButton()
        leftButton.setTitle("Left", for: .normal)
        leftButton.addTarget(self, action: #selector(scrollToLeft), for: .touchUpInside)
        leftButton.backgroundColor = .black
        leftButton.setTitleColor(.white, for: .normal)
        leftButton.frame = CGRect(x: 10, y: 10, width: 100, height: 40)
        self.addSubview(leftButton)

        // add a right button to scroll right
        let rightButton = UIButton()
        rightButton.setTitle("Right", for: .normal)
        rightButton.addTarget(self, action: #selector(scrollToRight), for: .touchUpInside)
        rightButton.backgroundColor = .black
        rightButton.setTitleColor(.white, for: .normal)
        rightButton.frame = CGRect(x: screenBounds.width - 100 - 10, y: 10, width: 100, height: 40)
        self.addSubview(rightButton)

        leftButton.topAnchor.constraint(equalTo: self.topAnchor, constant: 16).isActive = true
        leftButton.leadingAnchor.constraint(equalTo: self.leadingAnchor, constant: 16).isActive = true


        rightButton.topAnchor.constraint(equalTo: self.topAnchor, constant: 16).isActive = true
        rightButton.trailingAnchor.constraint(equalTo: self.trailingAnchor, constant: -16).isActive = true
    }

    //handle when world button is selected and trigger the callback
    func onWorldButtonTouch(world: World) {
        onWorldSelected(world)
    }

    @objc func scrollToLeft() {
        let currentOffset = scrollView.contentOffset.x
        let itemWidth = scrollView.frame.size.width
        let previousPage = max(currentOffset - itemWidth, 0)
        scrollView.setContentOffset(CGPoint(x: previousPage, y: 0), animated: true)
    }


    @objc func scrollToRight() {
        let contentWidth = scrollView.contentSize.width
        let currentOffset = scrollView.contentOffset.x
        let itemWidth = scrollView.frame.size.width
        let nextPage = min(currentOffset + itemWidth, contentWidth - scrollView.frame.size.width)
        scrollView.setContentOffset(CGPoint(x: nextPage, y: 0), animated: true)
    }
}

// the World enum, to add a new world is very simple, we can now just add a new entry this enum and it will get automatically added to the selection screens
enum World: Codable, CaseIterable  {
    case world1
    case world2
    case world3
}

// simple extension to get the label to display if need be. This could be refactored further to contain more information.
extension World {
    func getLabel() -> String {
        return switch self {
        case World.world1:
            "Lumina Prime"
        case World.world2:
            "Astra-Veridia"
        case World.world3:
            "Nebula Nexus"
        }
    }
}
次に、これが使用されます:
HomeViewController.swift:
import UIKit

class HomeViewController: UIViewController {

    override func viewDidLoad() {
        super.viewDidLoad()
        self.view.backgroundColor = .darkGray

        addWorlds()
    }

    func onWorldSelected(world: World) {
        let viewController = ...

        navigationController!.pushViewController(viewController, animated: true);
    }

    private func addWorlds() {
        let worlds = Worlds(appF: appF(), onWorldSelected: onWorldSelected)
        view.addSubview(worlds)
    }
}
これが見えます:

ハッピーパステストでは、テストはワールドが移動可能かどうかを確認します。以下はその様子です:
何らかの理由でコードが壊れてワールドに到達できなくなった場合、このテストはリグレッションのために失敗します。以下はそのテストの完全なコードです:
    func testICanNavigateThroughToAllWorlds() throws {
        app.launch(with: createTestAppF())

        assertWorldPresent(expectedWorld: World.world1)

        navRight()
        assertWorldPresent(expectedWorld: World.world2)

        navRight()
        assertWorldPresent(expectedWorld: World.world3)

        navRight()
        assertWorldPresent(expectedWorld: World.world3)

        navLeft()
        assertWorldPresent(expectedWorld: World.world2)

        navLeft()
        assertWorldPresent(expectedWorld: World.world1)

        navLeft()
        assertWorldPresent(expectedWorld: World.world1)
    }

    fileprivate func assertWorldPresent(expectedWorld: World) {
        let worldLabel = expectedWorld.getLabel()
        let actualWorld = app.buttons[worldLabel]
        XCTAssertTrue(actualWorld.isHittable)
    }

    fileprivate func navRight() {
        let rightButton = app.buttons["Right"]
        rightButton.tap()
    }

    fileprivate func navLeft() {
        let rightButton = app.buttons["Left"]
        rightButton.tap()
    }
次の記事では、ワールドが選択された後に何が起こるかを探求します - ユーザーがスクロールするときに素敵なパララックスエフェクトを持つレベル選択画面に移動します。
サポート方法
このコンテンツは常に無料で提供されます。価値あると感じたら、他の人と共有することを検討してください。また、私たちのゲームをダウンロードして正直なレビューを残すことは、私たちを大いにサポートします。質問やフィードバックがあれば、お気軽にお知らせください。できるだけ迅速に対応させていただきます。
今すぐApple App Storeから『Falling Sky』をダウンロード:[https://apps.apple.com/app/id6446787964]
Xで私たちにフォロー:[https://x.com/_kingdomarcade]
Comments